Jun 20, 2015

Zooming in on Spring

It's that time of the year when the hot weather comes back and Summer is about to make its grand comeback!

So, why not say good-bye to Spring with some shots of those amazing moments when everything looks dry and lifeless, but little spurs of color start peaking out from here and there, reminding us that they're back, and that they will inject a burst of hues where there seems to be none...


Our cherry bushes finally are strong enough to gift us fantastic cherry blossoms! We got them three years ago and we were hoping they liked their little spot - and they do! Each blossom is perfect!


How about the carpet of itty bitty flowers?  Yes, they are weeds! But I must confess there's something inside me that smiles each times I look outside and there's a carpet of lilac with hints of blue...  


I could not resist slowing down and turning back when driving to a friend's house, just to get these beauties! It's a phone pic, so it's not my favorite shoot - no worries!  I just think that having the blessing of enjoying a bit of something pretty at the side of the road should not go unnoticed...  :)


And how about this vibrant pink little flower! It grows on a bush in the back of the house, so it generally sneaks out! I'm glad I didn't miss it this year! :)


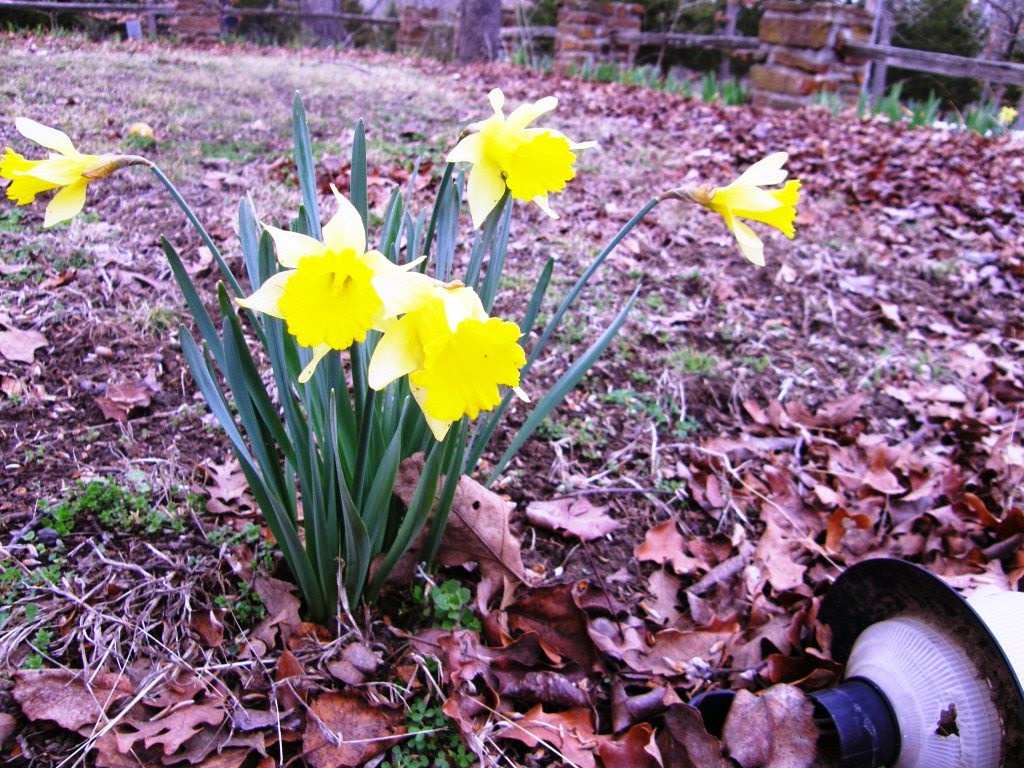
How could I forget the first comers... Daffodils! So cheery and beautiful! I thought they looked particularly strong next to the garden lamp that didn't quite make it through the winter...


Hats off to the humble wild rose! Nothing seems to shy her away, and each years it comes back stronger, sturdier and with that fantastic deep pink that manages to make me smile each time... :)  (And I smile even wider when I remember that somebody mowed it more than once... lol He just made it hardier!) 


And how not to mention storms... A mighty witness of the power of nature that invites us to remember God and His multiple blessings!


Another survivor of my non-so-green thumb... I look forward to having blackberries any time soon!


Stay blessed!

Yiya


Jun 3, 2015

April BOM - Pine Needle Basket

Oh man! That's about as much as I can say when we're already in June and I haven't blogged about the Pine Needle Basket (rolling eyes at myself...).

It seems that we have less and less time every day, and I'm having issues wiggling in some quilting in the middle of it all.  (Sigh!) I may need to become a full-time quilter and part-time worker if I will ever keep up with this.  I must say that I harbor a new admiration for those bloggers that post every week; yes, I salute those bloggers that come back and take care of stuff constantly and have a seamless blog!  Even with a weekly post, their blogging is substantial an interesting - like those books that keep you plugged in page after page, all the way to the end!

I can't go back and make sure that my late blogs match the month they're supposed to. But what I can certainly do is give myself some minutes and share more quilting adventures with this fantastic baskets!  

Yes, baskets are growing on me.  I'm not sure whether I'll ever make another basket quilt. I just know that the experience I am getting is well worth the effort!

So, here is where we were last post... 


Here is what this post is about - the handle. And it's paper pieced!  I just love paper piecing! It allows for so many shapes in a simple and precise way. So, I'll share how I made this handle, hoping that it sheds some light in a dark, far-away quilting corner that has not seen paper piecing before...


The picture above is the template, and it is a mirror image of the finished piece. It does not have a lot of steps, or "sections" of fabric, but it has tricky angles, so you need to make sure that all the areas are covered.


This is what I like to do - folding the paper and make sure that the piece of fabric I'm using goes beyond the area that needs to be covered.


Fold as much as you need to make sure everything will be OK...


Then cut. Leave a bit of extra fabric around, just to be on the safe side.


Also, make sure that all the lines in the template are 'marked.' Try using a ruler, a piece of mylar or a card to fold the template on each of the marked lines; this will make other steps easier.


Fold the template on one of these lines and cut the fabric, 1/4" off. If you prefer, sew the fabric by following the fold line and then cut - it works both ways.


Keep going...

See how the stitch line follows the pattern lines?


Just keep going, making sure you've got enough fabric. Also, remember to open the fabric before cutting - you'll save yourself a huge nightmare!  :)


And here is what it looks like after it is finished and trimmed. You don't even have to worry about the direction to press the fabric.


This basket just needed a pretty pieced handle to be ready...


Don't forget your best friend: the intersections to make everything super accurate.


And here you have it! Pine Needle Basket! 


One more down for the Craftsy 2015 BOM.  We are supposed to start working on applique, too... Which I haven't done before... like never... Quite curious here, with a crafty bone that keeps itching in anticipation... Feels good!  :)

Stay blessed,

Yiya