Dec 31, 2014

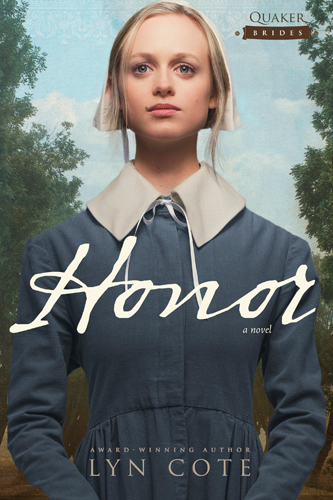
Honor, by Lyn Cote


I often wonder how blessed we are in so many different ways - today, we live in a time and place where and when we can exercise free will without major opposition. This is not true for Honor, a plantation heiress who, along with her maid, goes from a fairly comfortable life to destitution when Honor makes a decision based on her beliefs and convictions, while defying those of her family.

As a result, Honor has to face harsh consequences, but she stays true to herself despite the unexpected harsh reality she ends up in. In a time and moment where slavery, abolition, abuse and violence are staple, her determination is admirable. Her plans do not come to be as she had expected and marries Samuel out of convenience. They both learn to accept and love each other and become two characters who exemplify Christian character. In this sense, this book could be a great teaching tool. 

However, there are elements in the story and the way it is written that made it less effective or more incredible (as in not being credible), at least for my taste. (SPOILER ALERT NEXT) For example, no one is able to master a language in three days, but due to Samuel's needs, Hope learns to sign in a extremely unrealistic short period of time. I understand this is a work of fiction, but this is way too farfetched. Also, Honor is initially engaged to another man, who clumsily reappears by the end of the story after the author includes a sub-plot that shows his true colors. His showing up at Honor's new house brings a little suspense and edge to the story, but the situation is highly inconclusive, as it is finished almost as fast and abruptly as it started. Personally, I think that this event could have brought much more to the story, rather than turning it into a book with a weak ending.

I received a complimentary copy of this book from Tyndale Publishers, in exchange of an honest review. This has not biased my opinion on the book or the author.

Sep 14, 2014

Addie's Quilt - The End!

Transformation, creation, intricacy, exploration, learning and even prayer... all of them right there along the process!

This is the last post on Addie's Quilt and I can hardly share enough of how excited I have been with this piece of quilty craziness that I had the opportunity to work on!

I don't want to say much; just invite you to enjoy the satisfaction and thankfulness of a finished work...


...and a failed attempt at a fancy picture with the quilt draped on a chair. Oh my! I guess that's why some people are professionals - but not me, hehehe. I guess I'll have to practice more and more before I can get one of those cover-worthy shots!  :)


And why not some pictures of the back? After all, Addie's gramma saw this side first and she thought this was the front!  :)


I like the evening light for photographing a quilt; I can see an interesting play with the piecing and the quilting without having a huge contrast between those.  I kept wanting to have one of those really nice pictures with the quilt draped on the fence, but I'm not sure I am really happy with the results.


And a little something for Addie to remember... Lilies were about to bloom when her quilt was finished!

I do realize this may disclose how long it takes to go from the quilt to the blog, but I think my first baby quilt deserves a little TLC and time!  :)  


It was a pleasure to work on Addie's quilt in so many ways! Not only did I learn and experimented with new techniques, but seeing every single part of it take place is like a dream... Those ideas in my head keep spinning and tickling just thinking of the many possibilities and endless creative moments!


Thank you for sticking with these posts and sharing Addie's story and my adventures in quilting!  

I am working on a new series and I really think you will enjoy it!  :)

Have a wonderful day and stay blessed!

Yiya

Sep 7, 2014

Mosaic Jello - Take 2!

Hello! I hope all of you are doing well!  Man! I miss blogging so much! I guess any blogger has to face busy schedules, and even photo retouching before hitting that "publish" button, but I sure would like to have a recipe for managing it all!  :)
 
Alas! In the craziness called life, my sweet neighbor - those that are like precious stones: rare and amazing - had a little mishap. And I decided to turn around, take a break and prepare something he mentioned he really liked:  Mosaic Jello!!  Woohoo!!  
 
This is such a fun and easy to do recipe. I first blogged about it in Squares in my Jello, when I made some for a Christmas party at church, and it has been quite a hit!


Ever since, making another post showing a wider variety of colors has been in my mind, so here it goes!  

Just a little parenthesis: if you would like to make this jello, please read my previous post, where the recipe is described step by step.

Yes, COLOR!! This is what this jello is about. I did not pay much attention to the flavors, I just wanted COLOR!!  Lime, pineapple, fruit punch and grape made it to the final product and it was actually quite yummy.  :)


Here are they after setting... It was hard to keep Mr. Fuzz away from these! He really appreciates Mr. D, and he knew this was for him - probably this was the only reason that kept him away, hehe...

And after scoring the jello to get the little squares...


...in they go to a beautiful bundt pan! Yes, I know... As usual, I cannot make things simple, and I really wanted to make something special.  At this point, feel free to spray the inside or very lightly oil the pan to make sure that nothing sticks.  Give it a little shake to make sure that colors are mixed.


Oh! I also had some punch cups leftover, and I went ahead and made individual portions so that mom and dad could have a bit.  By the way, one of these never made it to be a mosaic... Mr. Fuzz got there first... I'll let you put 2 and 2 together, hehehe 

(Mental note: Mr. Fuzz really enjoyed these jello cubes, so they could be a good munchy treat for him!)


And here they are, right after taking them out of the fridge!!  So excited!!  The challenge was the bundt pan; grandma used to warm up water, but...


...I found out that using water at room temperature would work just as well.  (Sigh!) I used lukewarm water and the jello started to dissolve... This would have looked so pretty and not smeared, but at least I can suggest not to warm up the water!  lol


Mr. D was so happy!  Mrs. D thought it look beautiful!  :) They are such gentle and sweet people! The flavor was great as well!


And here are the little individual servings. These are what I was talking about in my first post about the mosaic jello, when I talked about making this an individual experience, or adapting it to the event. 

Just imagine how easy cleanup would be! And these little cups of yumminess make such a nice centerpiece! 
 

I hope you try making this fun jello. It's yummy, different and so easy to make!

Stay blessed,

Yiya. 

Aug 30, 2014

Addie's Quilt - FMQ

Hello everyone!

Addie's quilt series is practically finished. But it HAD TO include a post just about FMQ.

The most challenging thing about this post are the pictures!  There are a bunch of things that can go wrong and sometimes the actual picture does not capture what we want to.  Or, it shows exactly that itty bitty thing that makes the quilt!

OK, I'm not a professional photographer, but I knew what kind of pictures I wanted.  Let's begin the experimentation with light.

Light enhances either the texture (a.k.a. quilting) or the piecing in a quilt. I had a hard time finding a place that would show details, but I really like how the next picture turned out.


This is in the same area, at a different time of the day. The quilt wasn't finished, but I think the flowers in the middle of the diamond are easier to see... Well, sort of...


I knew I wanted the quilting to emphasize the piecing; hence the diamonds in the intersections. Some of them got to have wavy lines to give yet another dimension to the quilted diamonds; they were like medallions scattered all over the quilt! I had an idea of how I wanted it to look, but the final results just blew my mind!


And here are close-ups of the flowers. It all starts with a simple spiral surrounded by loops that flow around the center.


Here is the back. The diamonds are easier to see, and you can get a glimpse of the loopy quilted flowers.


And here are the corners with the floating strips. The quilting is also a loopy flower surrounded by stippling.


The lines of the quilted diamonds created a nice boundary for the design.


I always like to enjoy the back of quilts as well. In this picture of a corner, the loopy quilted flower created a lot of movement in that lattice-like print.  Happy accident indeed!


Here is another back view of the diamonds. Every other one got wavy lines. This simple addition made a huge difference, simple to make and so classy!


And another happy accident... Two diamonds intersect on the back, right by Addie's name, forming a nice frame to the two embroidered legends. I guess my centering abilities are getting sharpened!  :)


This was an amazing journey for me. Little by little, sometimes just five minutes a time... Addie's quilt is finished and a stepping stone for more learning experiences has just been set!


Thank you for stopping by.  Stay blessed!

Yiya

Aug 2, 2014

Addie's Quilt - Sandwich and FMQ beginnings!

August is here!!  YAY!!  :)

OK, ok... Yes, I'm making a reference to my previous post, which was suprisingly close this one.  I figured that I'd better take advantage of precious time while I can sit at the computer and finally finish this post that has been in the draft mode for a while now...
 
Little Addie time it is!  She's growing too fast, and she is super cute!  I wonder if she'll ever visit this post and enjoy seeing how her quilt was made.  Who knows! Maybe it will be the perfect motivation for a sweet little girl to make friends with needles and threads! 

We left off in the back of Addie's quilt, which means that the next step was the quilt sandwich. I don't have much room to pin a quilt sandwich, so I use a wonderful flat space: the floor!  :)  


I use regular masking tape to secure the back.  It actually works great!  I was able to keep everything from moving, but I also got a bit of tension.


Now, the batting...


...and making sure it's all straightened out.


And here comes the top with all the strippy diamonds!!  :)


After some knee work, it is all pinned and ready to be quilted!


I had a hard time finding a good angle for this picture.  Despite all my efforts, light was kind of dark, so I tried to enhance the colors with the computer.  I'm not really happy with the results, but I hope you can get a general idea of how close the pins are. This really depends on the kind of batting you are using; however, I like having things secure while shifting and squishing and wiggling the quilt around the sewing machine. 

Of course, the more pins around the sewing area, the more careful you should be when moving the quilt. Just be ready to bump into one; and yes, I said "be ready."  Once you are familiar with the pattern you are quilting (either by sketching or quilting), you know the direction, curves, angles and movement.  This definitely helps with when and where to expect a pin bump.


Here are two other angles. Note that there are two pins in each diamond, in opposite squares, there is one in each intersection and one more in the sashing, close to the middle of the block.  I like doing this to keep seams where they should be. 


I really didn't have a specific plan for the quilting. I watched Crafty's free QuiltCon Lecture Series 2013; in it, there is a seminar by Angela Walters and she mentioned that she likes the quilting to enhance the piecing - brilliant! That idea has stayed with me and I always think of it whenever I think of quilting, whether it is admiring already finished quilts, or me being in the process of deciding how to quilt.
So, use your imagination and take a look at one intersection...  Can you see the invisible lines going from one block into the adjacent ones?  It's almost as if there were an invisible diamond in each intersection!  


After this eureka kind of moment, I used my smaller square ruler to roughly mark a diamond at each intersection, to enhance the piecing.  Note that I did not remove the pins at all; I just worked with it, remove the caps, marked and capped them again.


FMQ beginnings - what an exciting and fuzzy moment of crafty thoughts twinkling all around.  Aaaah!  The beauty of a non-perfect chalked diamond that will transform into a bit of wonder...  And that's the stuff the next post will be about!  :)

That's the right moment I try to stop and enjoy the moment.  I thank God for the abilitites He has given me and just awe at the marvels He has created... Looking out the window, a cardinal sits majestically on the wired fence and a gorgeous lily flutters behind it, playing with the wind...

Stay blessed!

Yiya


Jul 31, 2014

Easy-piecey Swarovski Earrings

Oh my!  Where did July go?  With everything going on and school about to start, this has been a heck of a busy month! I know I have shared a bit about my job, but what I do has to do with assisting people attain their career goals - and it's great to see their excited expressions when they know there is a chance for them to go back to school!!  I just thank God for the opportunity to have such a rewarding job and having the possibility to encourage others to fulfill their dreams!  

Needless to say, work days have been intense, and my Crafty-Bloggy bone is kind of numb by the end of the day... lol

But I just cannot let July go by without another post!  And as promised, I prepared a little extra when I worked on the Swarovski bracelet for Craftyful some weeks ago.


And no, I'm not an expert jewelry maker, but that's the beauty - it's so easy to make and it looks really cute!  If you have never made a bracelet before, this technique is really easy - that's probably why I'm able to pull it off, hehe...

So, let's make a nice pair of dangling earring to go with your braided bracelet.


Check this tutorial on "The Wired Tree" to get the instructions on the first step - using wire or posts to create a hook on each crystal.


I like to make sure I have at least two crystals per color; it doesn't hurt to use the bracelet as a reference:


Also, make sure that you have the same number of hooked beads for each earring:


Take one ring and open it (remember to twist both ends gently; do not pull them away from each other). Insert five of the hooked beads. Double check that you insert different colors on each ring.


Insert a second ring. Close the first ring by gently twisting the ends back together. 


This is where your tweezing skills become useful. Repeat the same process; gently twist to open, insert hooked beads, another ring and gently twist ends together.  You just need to add an ear hook...


... and that's it!


Cute and easy to make!  I still find it funny that the best pics turned out to be the ones I took on the cutting mat, which is generally covered in threads, fabric, quilting rulers and scraps!  

Stay blessed!  

Yiya