Apr 25, 2014

Cheery Mellow: Double Star, Take 2!

Another one, you say?  Yes!  All things deserve a second chance, and this Double Star made with flying geese units is no exception. The first Double Star for Cheery Mellow is not quite what I was expecting. I was wanting the outer stars to sort of blend with the background, but I am not sure of the final effect.


Just like I mentioned in that post, fabric makes a whole difference in this block; the two stars are supposed to be seen, not blend! (Duh!) (And that was for me and my blending ideas for a block that is really needs contrasting, not blending fabric - and I knew it!) Anyway, I generally move on, but not this time! So I decided to go ahead and make a second one, using the gray fabric for the outer points.

What do you think?  Both are nice, but the shapes in the second block definitely stand out!  If you decide to give this a try, just have this issue in mind - ultimately, it's your block, so if you like the blendy groove... go with it! :)


By the way, I learned how to do this from Craftsy's 2012 Block of the Month Class. This is one of their free classes that you can watch over an over because it never expires! How cool is that! And it's freeeee!!!  :)

So here is the fabric, ready to go!  You can find the size you need to cut in the class materials. By the way, these measurements don't leave much wiggle room, so a scant 1/4" seam came in handy...


Draw a diagonal line in all the squares.  This is completely optional, but it really helps me if I want to include accuracy in the equation...  :)


I know these are small units, but that little corner seems to always shift... I find that if I take the extra time to secure at least the corner where the seam ends, the final unit will always be more accurate... Ah! Accuracy and matching seams... like a dream come true! 

Now, let's tackle the geese!  Isn't that a funny picture? Tackling geese... ha! I guess I'm glad these have no feathers and cannot get mad!


By the way, these are perfect units for getting extra half square triangles, so I'll make sure that the optional steps for this technique are clearly set apart from the regular process:

Optional step: Double check my Cutting Corners post! Whenever you sew two 90-degree corners, just like for these flying geese, go back, sew a second seam and...


Now we have the corners ready to cut!


...cut in the middle of both seams. The "triangle" on the right in the next picture is generally discarded, but...


...with this trick, you will end with something that looks like this:


The first side of the flying geese units is done!  It is very important that you press the geese open before going on to the next step.

You are more than welcome to save the extra triangles for later; I just thought it would be a good idea to show how they come along with the main units for this block.


Once the first corner is pressed open, repeat the previous steps with the other side.


We now have something that looks like this:

(See why I like the extra HST tip?  Once this little "survivors" start to pile up, it's difficult to picture them as discarded pieces of fabric... I can already see all the different compositions we can get with these little ones!)

  
I could not resist playing with the extra HST a bit... We can even make an extra Double Star! If you see the mat, I guess it will make it to a 9" block once finished... A little extra effort could go a loooong way!  :)


But going to the 12" inch star...  I find it's always useful to double check the layout before sewing; let me assure you - headaches are less frequent this way!  Besides, that seam reaper needs a rest every now and then (not that I use it often... hehe).


We need to start putting it together from the inside out; otherwise, the pieces won't fit!

The first step is build up the inner star, in rows: 


Then, sew the rows together:

Tip:  For better results, pin before and after the seams and right at the end; this will keep the fabric from shifting and the final result will be more accurate.


Join two flying geese units to form the upper and lower part of the outside star, like so:


Now, go ahead and sew two more flying geese units and two white squares to form the outer "columns;" I hope I'm not confusing you with so many units, squares, rows and columns - maybe it's easier if you see the picture:


Here it is!  A pretty pointy star with matching seams... woohoo!!  I'm really pleased with the results.


And here are the two double stars I have so far:


I definitely think that the one with the gray outer points stands out more. And, I also used a scant 1/4" seam for the second double star and, although I'd love to ask you to ignore all the wrinkles in the first star, I should not ignore the fact that fabric selection and shape are better in the block to the left.  

What do you think?  Please share your opinion in the comments!  :) 

But, heey! That's the idea!  Learning and searching for ways to improve our craft.

Here you go!  A beautiful double star for the Cheery Mellow quilt... Who knows when it all be done!


I hope you enjoyed making the Double Star - and don't forget all the extra tiny HST!  Thank you for reading and stay blessed!  :)


Apr 22, 2014

On this day of Spring

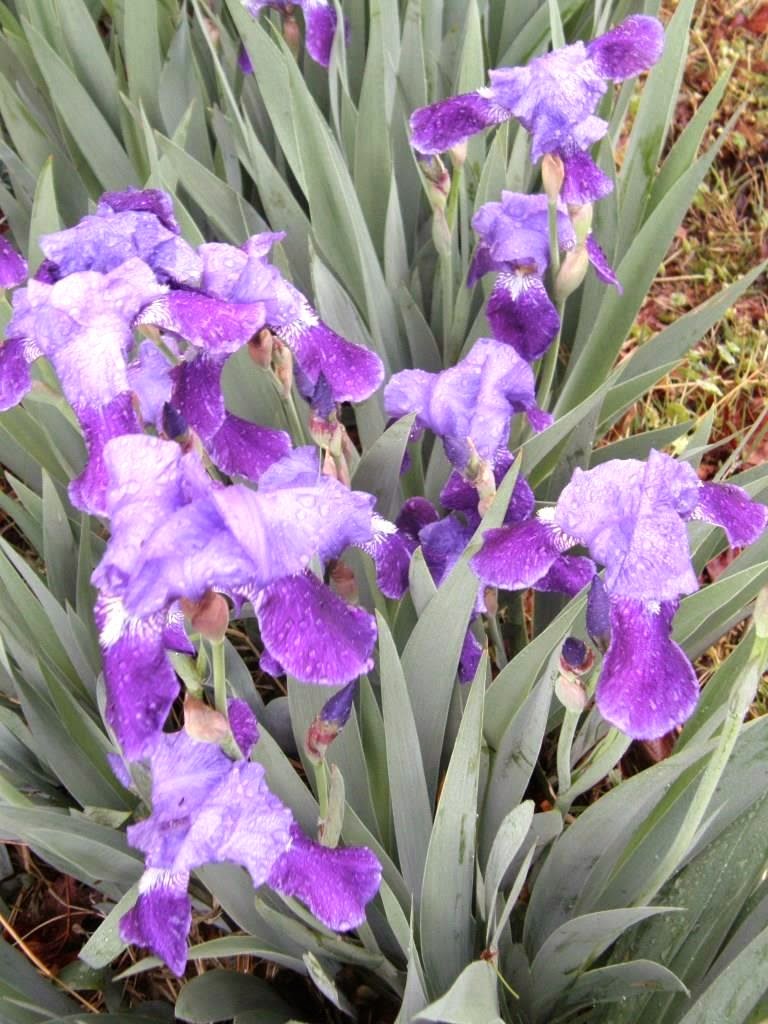
... I DEFINITELY needed an extra 5 minutes - to go outside!  I was getting ready to go to the office, and I rushed so that I could go and admire the gorgeous irises that bloomed overnight! Itty bitty violets are ready to burst open and the lilacs filled the mist with a delicious sweet aroma. A wonderful moment of admiration and delight, suspended in time, wishing it lasted forever.


I also received a new book from Tyndale for review. A woman waited a lifetime for something to happen. I remember Tita's hands, grandma's. They looked like the ones in the cover. She would hold me and with her immensely love, she taught me how to cook, sew and even played some music - she allowed me to be me and let my crafty bone lose! 


A dearest friend passed away. Cancer was not nice to her. I painted the backdrop for an Easter play at church three years ago. Bobby was standing next to me when I took this picture, before all the paint dried and it was hung in its final destination for a week of sharing about the love of Jesus for the world.


A memorable April 22nd on many levels; since the awe at the little dew drops on delicate petals to the veil opening and making gorgeous flowers bloom to receive a loved one in heaven.  


God's love is all around...

Apr 20, 2014

Easter Sunday


I generally post about my adventures in quilting, crafting and the occasional extra topic...  None of this would be possible without Jesus and what did - and is still doing - for me.  He has given me purpose and identity. Because of Him, there is hope in my life.

Whatever your beliefs, I wish that the hope of eternal life is with you and your family.

Stay blessed!


Apr 14, 2014

Cheery Mellow: Double Star

More Cheery Mellow with this bright fabric - a double star made with a bunch of flying geese.  

I actually didn't follow a pattern.  When I first saw it, I thought it was made just of Half Square Triangles, but then I noticed that the geese units didn't have a seam in the middle...  That certainly caught my eye, and I just had to try it!


Something you need to double check is fabric combination. If there is not enough contrast between the three fabrics that make up the star, the shape could be lost. I initially thought of using the following fabric...


... but ended up with the following combination. There is certainly more contrast with the yellow background than with the smaller yellow flowers. Although I was going for a more significant contrast, I am not quite sure that I really like the final block; the white background blends a tad too much for my taste. I guess there is a second double star in the horizon (big sigh); but hey - that's the idea, right? Practice and learn!


So here is the beginning of the star...


Nice little squares and rectangles all ready to get transformed!


And here they are!  Nice flying geese units ready to turn into a star! This is one of the things that mesmerize me about quilting... all the different patterns and possibilities that may be formed using the same basic figure. I actually experimented a bit with them, and ended up with optional, extra HST (half square triangles) by sewing a second seam in the corner, rather than just cutting off what is not part of the flying goose. I ended up putting the cart before the horse and posting Cutting Corners: Tips on Extra Half Square Triangles before the Double Star...  I guess I can blame it all on a bit of quilty excitement!  :)


You can see how it all comes together. The MAJOR issue with this block is the sewing order...  Yep!  Even the order in which itty bitty pieces are sewn make a huge difference in how it all turns out.


And here it is! A double star ready to make it (eventually) into a sampler quilt.  I am really not planning anything in particular, I just want to practice shapes and techniques by making a bunch of 12.5" unfinished blocks.


Making something new to me, although it is a traditional quilting technique, is always interesting. Moreover, finding the extra surprises by adding optional seams sure is a major plus!

How about you? How do you stay on top of things and practice skills?  

Thanks for stopping by, and stay blessed!  :)

Apr 12, 2014

Craftsy Spring Flash Sale

Craftsy Spring Sale
Who doesn't like suprises?  Well, Craftsy has prepared a wonderful one for the weekend - there are a bunch of classes 50% off!! Don't miss this chance and find all the wonderful online classes that never expire and that can be watched as many times as you want!

Spring Flash Sale This Weekend Only on Select Craftsy Classes!
**This post contains affiliate links and I will be compensated if you make a purchase after clicking on my links

Surprise! Craftsy has just announced a Spring Flash Sale for this weekend only! Discover huge savings on select online Craftsy classes, but for a very limited time.Visit Craftsy to reveal what classes are on sale, but hurry, this offer expires at 11:59 MT on Sunday, April 13, 2014!


Craftsy

Apr 7, 2014

Cutting corners: Tips for extra Half Square Triangles

How many times have you finished putting a block together and ended up with scraps?  Well, it's not uncommon to cut off 90 degree corners and discard the extra pieces of fabric.

Somehow, this didn't feel right, so I decided to start experimenting with corners...  The result is tiny Half-square triangles, or HST, that can be used for another project.

For example, in making the flying geese to the left, I ended up with the HST to the right...


This is possible ANY time you are joining two pieces of fabric with a 90 degree corner and sew a 45 degree seam. Sounds weird, huh?  Just bear with me and let me show you what I'm talking about with pictures.

In the one below, you can see the joining of strips of fabric to form a quilt binding. Notice how the two ends of the strips are on top of each other, forming a corner.


The instructions for binding call for a diagonal seam from the inner to the outer corner. Pay close attention to the pic above; you will see a pencil line marking a diagonal line (which would be the 45 degree seam line).  

Just sew right on top of this line. This is the first step.


If this post was about making binding, instructions would call for cutting the corners to the right of the seam, leaving 1/4 inch of fabric.

But if you want an extra HST, don't cut the fabric off! Instead, sew a second seam about a 1/2 inch from the original seam on the area that would have been cut off in the first place.


You will end with corners that have two seams, like so:


In the following picture, the two seams are highlighted in BLUE.


The next step is cutting on the YELLOW line...


... so you will have the original unit (in this picture, the fabric to the left) and an extra HST that would have been discarded. Press open.


The result is an extra bunch of little half square triangles that would have made it right to the trash can to never be seen again! 


Now, we need to make sure they form a nice square. Remember that these are extra pieces that result from a completely optional step; they generally tend to be tiny.
 

I chose to cut these units to form a 1 3/4 square to be on the safe side; the size of the square will vary depending on the original corners you had.

Just make sure that the 45 degree line in your ruler is right on top of the seam - this is VERY important; this step will guarantee that the points line up when you sew all the pieces together.
 

Here is the same step, just with a different color of fabric; I thought this would make it easier to see in a picture.
 

Now that all your HST are squared up, you're ready to let your crafty bone loose and play with the arrangements!
 

How about a little diamond?
 

Or random placement with the seams facing the same direction?
 

If you have more, you can even get 4 little diamonds, so cute!
 

 Or even chevrons; just make sure you have enough HSTs...  :)


I am really developing a weak spot for this arrangement, more uniform, but so crisp and modern!


There are many other units that you can obtain extra HST from. They don't even have to be completely even, because of the squaring up...

How about you? Can you think of any blocks that can yield an extra unit from a rescued "almost scrap?" Please add your comments and share pictures!  Sharing is the best way for everyone to learn and explore more crafty ideas.

Thanks for stopping by and stay blessed!  :) 


Post Post... Does this even exist?


This Double Star is made with flying geese, 
perfect for getting extra HST!


Let's not forget about Strong Tower. Beautiful block and 16 extra HST!


A new piece joins the Extra HSQ gallore... Peppy yields a lot of them and I couldn't leave the scrapps alone! The center piece and some of the HST that ended up in the improv areas came from that little extra seam.